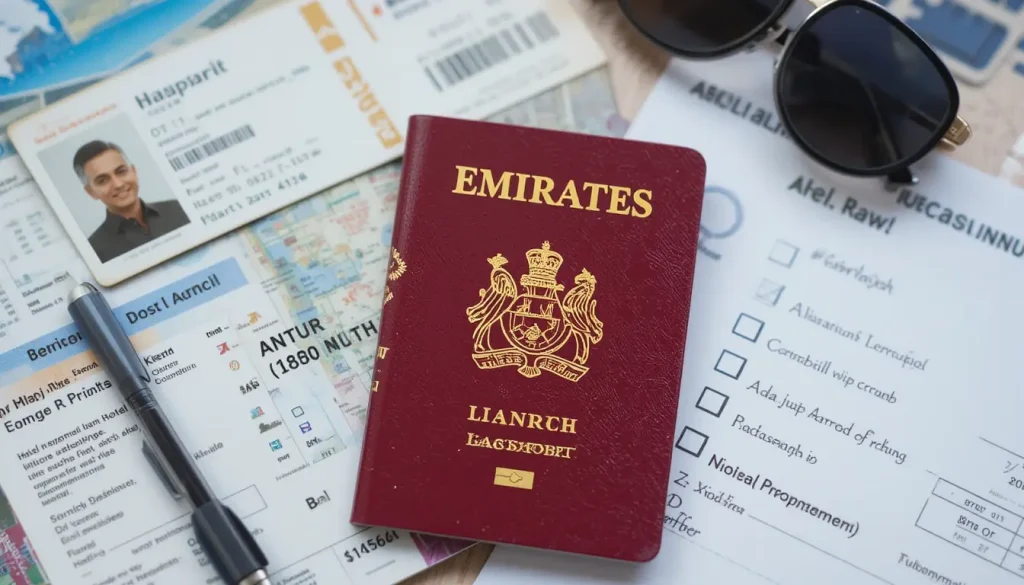
Applying for an Indian tourist visa from Dubai can feel overwhelming. With multiple visa types, intricate application procedures, and the ever-present worry of rejection, even seasoned travelers can get stuck before they start. UAE residents often dream of exploring India’s vibrant culture, historic landmarks, or visiting family but the visa process can feel like an obstacle rather than a gateway.
Are you a UAE resident eager to experience India’s bustling cities, serene beaches, or ancient heritage, but intimidated by the visa process? Confusion over e-Visas versus regular visas, unclear document requirements, and fear of costly mistakes can turn what should be an exciting travel plan into a stressful ordeal.
Picture confidently submitting your application, knowing every step is correctly completed, the right visa is secured, and your trip to India is fully approved all without unnecessary stress. This guide transforms uncertainty into clarity, equipping you with all the essential information, expert tips, and direct resources for a smooth, successful visa application.
By following our detailed, step-by-step instructions and understanding the nuances of each visa type, you’ll gain the confidence and knowledge to navigate the process seamlessly. We’ll demystify common pitfalls, clarify document requirements, and provide practical advice to ensure your travel plans are stress-free turning your dream trip to India into reality.
1. Understanding Indian Tourist Visa Types: E-Visa vs. Regular
Navigating the Indian visa landscape from Dubai starts with understanding the two primary tourist visa types available: the Electronic Visa (e-Visa) and the Regular (sticker) Visa. Each serves different travel needs and follows a distinct application process. Choosing the right one upfront can save you time, money, and stress.
1.1. The Indian E-Visa: Convenience for Short Stays
Overview:
The Indian e-Visa is an electronically issued travel authorization, ideal for short-term tourism, visiting friends or relatives, or medical treatments.
Key Benefits:
- Fully online application no physical visit to the consulate or service center.
- Typically faster processing, often within a few days.
- Simple and convenient for short trips.
Limitations:
- Limited to specific entry/exit points in India.
- Shorter validity periods compared to the regular visa.
- Not all nationalities are eligible check the latest list.
E-E-A-T Consideration:
Always apply via the official Indian e-Visa portal: indianvisaonline.gov.in. Avoid third-party sites to prevent scams or delays.
1.2. The Regular Indian Tourist Visa: For Longer Stays or Specific Needs
Overview:
The regular tourist visa is a traditional sticker visa affixed to your passport, processed through BLS International, the authorized visa service provider in Dubai.
Key Benefits:
- Longer validity options up to 5 years, ideal for multiple visits.
- Flexible entry and exit points across India.
- Suitable for all eligible nationalities.
Limitations:
- Requires a physical appointment and document submission.
- Processing times are typically longer than the e-Visa.
E-E-A-T Consideration:
Use BLS International as the official channel for regular visa applications: https://www.blsindia-uae.com.
1.3. Comparison Table: Indian E-Visa vs. Regular Tourist Visa
| Feature/Aspect | Indian E-Visa | Regular Tourist Visa |
| Application Method | Entirely online via official portal | Online form submission, then physical submission at BLS International |
| Physical Presence Required | No | Yes, for document submission and biometric capture |
| Eligibility | Over 170 nationalities (check current list) | All eligible nationalities |
| Purpose | Tourism, casual visit, short-term medical | Tourism, casual visit, medical, business, etc. |
| Validity | Up to 1 year, multiple entries (check specific type) | Up to 5 years, multiple entries |
| Max Stay per Visit | 30–90 days depending on nationality | 90 days per visit (cumulative 180 days per year) |
| Entry/Exit Points | Designated airports and seaports only | All authorized entry/exit points (air, land, sea) |
| Processing Time (approx.) | 72 hours – 5 business days | 5–10 business days (can vary) |
| Required Documents | Digital photo, passport scan, application form | Physical passport, photos, application form, supporting documents |
| Cost | Varies by nationality and visa type | Varies by nationality and visa type, plus BLS service fee |
1.4. Choosing the Right Visa for You
Considerations:
- Travel purpose (tourism, visiting family, medical)
- Duration of stay
- Nationality
- Urgency of travel
- Willingness to visit a physical visa center
Audience Pain Point: Many UAE residents struggle to choose between the e-Visa and regular visa.
Unique Content Element: Interactive ‘Which Visa is Right for You?’ Quiz
- Concept: A short, guided quiz with 3–5 questions about nationality, travel purpose, and duration.
- Outcome: Personalized recommendation for either an e-Visa or Regular Visa, with a concise explanation.
- Differentiation Opportunity: Use flowcharts or visual decision trees to make the process intuitive and engaging.
2. Eligibility Criteria for Indian Tourist Visas from Dubai
Before applying, it’s essential to know who can obtain an Indian tourist visa. Eligibility mainly depends on your nationality, UAE residency status, and the purpose of your visit. Understanding these criteria upfront can save time and prevent application delays.
2.1. Nationality Requirements
- E-Visa: Available to citizens of over 170 countries. Always check the official Indian e-Visa portal for the latest eligible countries, as the list may change periodically.
- Regular Visa: Generally available to all eligible nationalities, subject to bilateral agreements or restrictions between India and your country.
2.2. UAE Residency Status
- Applicants must be legal residents of the UAE.
- A valid residency visa is required for submission, whether applying for an e-Visa or a regular visa.
- Proof of residency may include:
- Emirates ID
- Copy of residency visa
- Emirates ID
- This ensures authorities can verify your legal status in the UAE before approving your Indian visa.
2.3. Purpose of Visit
- Tourist Visa: Strictly for:
- Recreation and sightseeing
- Casual visits to friends or relatives
- Short-duration yoga programs
- Recreation and sightseeing
- Not allowed:
- Employment or business activities
- Missionary work
- Long-term education
- Employment or business activities
Pro Tip: Applying for a tourist visa for non-permitted activities may lead to rejection or future entry issues.
2.4. Passport Requirements
- Validity: Your passport must have at least six months’ validity from your date of entry into India.
- Blank Pages: Ensure your passport has at least two blank pages for visa stamping (for regular visas) and immigration entry/exit stamps.
Expert Tip: Double-check these requirements before applying passport issues are one of the most common causes of visa delays.
3. Required Documents Checklist (E-Visa & Regular Visa)
One of the most common reasons for visa rejection is submitting incorrect or incomplete documentation. Use this detailed checklist to ensure you have everything needed for a successful application, whether applying for an Indian e-Visa or a Regular Tourist Visa.
3.1. General Documents (Applicable to Both E-Visa & Regular Visa)
- Valid Passport:
- Regular visa: Original passport with at least 6 months validity and two blank pages.
- E-Visa: Digital scan of passport bio page.
- Regular visa: Original passport with at least 6 months validity and two blank pages.
- Passport-Sized Photograph:
- Must be recent (not older than 6 months), 2×2 inches (51×51 mm), color, with a plain white background, full face, front view, and eyes open.
- Avoid shadows, reflections, or accessories that obscure the face.
- Pro Tip: Use online passport photo editors/resizers that meet Indian visa specifications.
- Must be recent (not older than 6 months), 2×2 inches (51×51 mm), color, with a plain white background, full face, front view, and eyes open.
- Completed Application Form:
- Regular visa: Printed and signed form.
- E-Visa: Uploaded digitally on the official portal.
- Regular visa: Printed and signed form.
3.2. Specific Documents for Indian E-Visa
- Scanned Copy of Passport Bio Page: High-resolution scan showing personal details and photograph.
- Digital Front-Facing Photograph: Meeting the size and background requirements mentioned above.
- Supporting Documents (if applicable):
- Medical e-Visa: Hospital letter.
- Business e-Visa: Invitation letter from Indian company.
- Tourist e-Visa: Typically, no additional documents are required beyond passport and photo.
- Medical e-Visa: Hospital letter.
E-E-A-T Tip: Always upload clear, high-quality scans to prevent processing delays or rejection.
3.3. Specific Documents for Regular Indian Tourist Visa (via BLS International)
- Printout of Online Application Form: Completed, signed, with photograph pasted.
- Proof of UAE Residency: Copy of valid UAE Resident Visa and Emirates ID.
- Proof of Address in UAE: Utility bill (electricity, water) or tenancy contract in applicant’s name.
- Proof of Financial Means:
- Bank statements for the last 3–6 months showing sufficient funds for the trip, or
- Salary certificate/employment letter.
- Bank statements for the last 3–6 months showing sufficient funds for the trip, or
- Flight Itinerary/Tickets: Confirmed round-trip flight bookings.
- Hotel Booking/Accommodation Proof:
- Confirmed hotel reservations, or
- Letter of invitation from host in India with their address and contact details.
- Confirmed hotel reservations, or
- No Objection Certificate (NOC): From employer/sponsor in UAE (if applicable), stating purpose and duration of travel.
- Previous Indian Visas (if any): Copies of past visas to India.
- Additional Documents for Minors:
- Birth certificate.
- Consent letter from non-accompanying parent (if applicable).
- Parents’ passports/visas.
- Birth certificate.
Expert Tip: Organize all documents neatly and double-check for accuracy missing or incorrect documents are the most common reasons for visa delays or rejection.
4. Step-by-Step Guide to Applying for an Indian E-Visa from Dubai
The Indian e-Visa process is designed for convenience, but attention to detail is crucial to avoid delays or rejection. Follow these steps carefully to ensure a smooth application.
4.1. Accessing the Official E-Visa Portal
- Official Portal: Always use the Indian e-Visa Portal: indianvisaonline.gov.in.
- Warning: Avoid unofficial websites or fraudulent visa agents, as these can lead to scams or incorrect applications.
4.2. Filling the Online Application Form
Step 1: Start New Application
- Select Visa Type: e-Tourist Visa
- Enter Nationality, Port of Arrival, Date of Birth
Step 2: Personal Details
- Accurately enter all details exactly as they appear on your passport.
Expert Tip: Even minor errors in name spelling, passport number, or dates can lead to rejection. Double-check before submission.
Step 3: Passport Details
- Provide passport number, issue date, and expiry date.
Step 4: Contact & Family Information
- Enter your current address, phone number, and details of parents or spouse.
Step 5: Visa Details
- Specify purpose of visit, expected date of arrival, and duration of stay.
Step 6: Previous Visa Information
- Declare any previous visits to India or Indian visas held.
Step 7: Security Questions
- Answer questions regarding criminal record, visa rejections, or other relevant matters.
Expert Tip: Maintain a stable internet connection and save your application frequently to avoid data loss.
Screenshot suggestion: Example of a filled section of the e-Visa application form showing data entry fields.
4.3. Uploading Documents and Photograph
- Upload your recent passport-sized photograph and scanned copy of your passport bio page.
- Ensure files meet specified size and format requirements (JPEG for photos, PDF for passport scans).
- Product Recommendation: Use online tools for image resizing or format conversion to meet portal specifications.
Screenshot suggestion: E-Visa portal’s document upload interface showing successful uploads.
4.4. Paying the E-Visa Fee
- Review your application carefully, then proceed to payment.
- Fees vary by nationality and visa type.
- Product Recommendation: Use secure online payment gateways. Ensure your credit/debit card (Visa, MasterCard, etc.) is accepted.
- Expert Tip: Keep digital and physical copies of all payment receipts for future reference.
4.5. Receiving Your Electronic Travel Authorization (ETA)
- Once approved, your ETA (Electronic Travel Authorization) will be sent via email.
- Print a copy of your approved ETA, as this serves as your actual visa when entering India.
- Present the printed ETA along with your passport at immigration upon arrival.
E-E-A-T Consideration: Clear, step-by-step instructions ensure UAE residents understand exactly what to do, reducing errors and increasing the likelihood of a smooth, successful visa approval.
5. Step-by-Step Guide to Applying for a Regular Indian Tourist Visa from Dubai (via BLS International)
For travelers who require a longer validity visa or prefer a traditional sticker visa, BLS International is the authorized service provider for the Consulate General of India in Dubai. Follow these steps carefully to ensure a smooth application.
5.1. Completing the Online Application Form
- Official Portal: Start by filling out the online application form on the Indian Visa Online portal (https://indianvisaonline.gov.in).
- Select “Regular Visa Application” instead of e-Visa.
- Select “Regular Visa Application” instead of e-Visa.
- Fill in all personal, passport, and travel details accurately.
- Generate the completed application form with a reference number.
Product Recommendation: Use Adobe Acrobat Reader to fill PDF forms digitally and ensure proper printing.
Expert Tip: Double-check every field minor mistakes can delay processing.
5.2. Booking an Appointment with BLS International
- Visit the BLS International Services UAE website (search for “BLS International India Visa UAE”) to book your appointment.
- Expert Tip: Schedule your appointment well in advance, especially during peak travel seasons, to avoid delays.
5.3. Document Preparation
- Print the completed online application form.
- Affix your passport-sized photograph as per specifications.
- Gather all required supporting documents (originals and photocopies) as listed in Section 3.3.
Expert Tip:
- Organize documents in the order specified by BLS to make submission faster and smoother.
- Bring all originals along with copies; incomplete submissions may result in rejection or delays.
5.4. Visiting BLS International for Submission
- Attend your scheduled appointment at the BLS International center in Dubai.
- Submit:
- Application form
- Original passport
- Supporting documents
- Application form
- Biometric Data Collection: Fingerprints and photograph will be taken.
- Payment: Pay the visa fee along with BLS service charges.
Expert Tip: Retain all receipts provided by BLS International they are proof of submission and payment.
5.5. Passport Collection
- You will receive a notification once your passport with the affixed visa is ready for collection.
- Collect your passport from BLS International and verify that the visa details are correct.
6. Indian Tourist Visa Fees and Payment Process
Understanding the costs involved in obtaining an Indian tourist visa is essential for budget planning and avoiding unexpected expenses.
6.1. Visa Fee Structure
- Visa fees vary depending on your nationality, the type of visa (e-Visa or Regular), and its duration.
- E-Visa: Paid online via secure credit/debit card. Fees are processed in USD and may differ by nationality.
- Regular Visa: Paid at the BLS International center in Dubai, typically in AED. Fees depend on visa type and validity.
Differentiation Opportunity: Providing a transparent fee breakdown including all mandatory charges and service fees helps applicants plan their budget accurately and avoid surprises.
6.2. Additional Charges
- BLS Service Charges: Regular visa applications include an extra service fee for processing at BLS International.
- ICWF (Indian Community Welfare Fund) Fee: Mandatory for all visa types, included in the overall cost.
- Payment Gateway Charges: E-Visa online payments may incur minor processing fees, depending on the bank or card provider.
6.3. Accepted Payment Methods
- E-Visa: Major credit/debit cards are accepted, including Visa, MasterCard, and American Express.
- Regular Visa (BLS International): Payment can typically be made via cash or card. Confirm accepted card types with BLS before your appointment.
Expert Tip: Always keep digital and physical copies of payment receipts. These serve as proof of payment in case of discrepancies or queries during processing.
7. Processing Times and Visa Status Check
Understanding processing timelines and knowing how to track your application can reduce stress and help you plan your trip effectively.
7.1. E-Visa Processing Times
- Typical Duration: Most e-Visas are processed within 72 hours to 5 business days.
- Recommended Application Window: Apply at least 7–10 days before your travel date to account for any delays.
- Expert Tip: Start your application well in advance, especially during peak travel seasons or unforeseen delays, to ensure a smooth approval.
7.2. Regular Visa Processing Times
- Standard Duration: Regular visas submitted via BLS International usually take 5–10 business days from the date of submission.
- Extended Processing: Certain cases, such as complex applications or applicants of specific nationalities, may require additional processing time.
7.3. How to Check Your Visa Status
- E-Visa: Track your application using your Application ID and passport number on the official Indian e-Visa portal under the “Check Your Visa Status” section.
- Regular Visa: Use the reference number provided by BLS International on their official tracking portal to monitor your visa application.
Audience Pain Point: Many applicants are uncertain about how to effectively track their visa status, leading to anxiety. Providing clear tracking instructions ensures applicants remain informed throughout the process.
8. Common Reasons for Visa Rejection and How to Avoid Them
Visa rejection can be frustrating, time-consuming, and costly. Understanding the most common pitfalls and how to avoid them significantly increases your chances of approval.
8.1. Incomplete or Incorrect Application Form
- Issue: Missing information, inconsistent data (e.g., passport number mismatch), or errors in personal details.
- How to Avoid:
- Expert Tip: Double-check all personal details, passport numbers, and dates before submission.
- Review your application multiple times to ensure accuracy.
- Expert Tip: Double-check all personal details, passport numbers, and dates before submission.
8.2. Improper Photograph or Passport Scan
- Issue: Photo not meeting specifications (incorrect background, wrong size, facial expression issues), blurry passport scan, or expired passport.
- How to Avoid:
- Follow the photo and scan guidelines outlined in Section 3.1.
- Ensure your passport has at least six months’ validity from the date of entry into India and at least two blank pages.
- Use high-resolution scans for clarity.
- Follow the photo and scan guidelines outlined in Section 3.1.
8.3. Insufficient Supporting Documents
- Issue: Missing bank statements, flight bookings, hotel reservations, or No Objection Certificate (NOC) from your employer.
- How to Avoid:
- Prepare a comprehensive checklist (refer to Section 3) and ensure all required documents are present, valid, and properly organized.
- Prepare a comprehensive checklist (refer to Section 3) and ensure all required documents are present, valid, and properly organized.
8.4. Misrepresentation of Information
- Issue: Providing false information or concealing relevant details.
- How to Avoid:
- Be truthful and accurate in all declarations.
- Misrepresentation can lead to rejection or even long-term visa bans.
- Be truthful and accurate in all declarations.
8.5. Technical Glitches During Online Application
- Issue: Payment failure, application not saving, or document upload issues.
- How to Avoid:
- Use a stable internet connection.
- If problems persist, try a different browser or contact official portal support.
- Use a stable internet connection.
Differentiation Opportunity: Include a troubleshooting section addressing common error messages or portal issues to guide applicants through technical challenges.
8.6. How to Reapply After Rejection
- Understand the reason for rejection, if provided.
- Rectify the identified issues.
- Submit a fresh application, ensuring all previous errors are corrected.
Expert Tip: Treat rejection as a learning opportunity correcting mistakes and carefully following guidelines greatly improves the chances of approval on reapplication.
9. Before You Go: Essential India Travel Checklist
Beyond securing your visa, a few key preparations can make your trip to India smooth, safe, and enjoyable. Use this ‘Before You Go’ checklist to ensure nothing is overlooked.
9.1. Travel Insurance
- Secure comprehensive travel insurance covering:
- Medical emergencies
- Trip cancellations
- Lost or delayed luggage
- Medical emergencies
- Expert Tip: Compare policies online to find coverage that best fits your itinerary and needs.
9.2. Local Currency
- Carry some Indian Rupees (INR) for immediate expenses upon arrival.
- Ensure you have options for withdrawing cash via ATMs, which are widely available in cities across India.
- Pro Tip: Keep a small amount of USD or AED as a backup in case of emergencies.
9.3. Health Precautions
- Consult your doctor or travel clinic about recommended vaccinations for India.
- Carry personal medications with prescriptions.
- Tip: Include a small first-aid kit for minor ailments during travel.
9.4. Connectivity
- Consider purchasing an Indian SIM card upon arrival or activating international roaming.
- Apps like Google Maps, Uber/Ola, and travel guides can be essential for navigation and convenience.
9.5. Customs and Etiquette
- Familiarize yourself with basic Indian customs and cultural etiquette to enhance your travel experience:
- Dress modestly in religious or rural areas
- Remove shoes when entering temples or certain homes
- Respect local customs and traditions
- Dress modestly in religious or rural areas
9.6. Emergency Contacts
- Save important contacts both digitally and physically:
- Indian Embassy/Consulate in UAE
- Local emergency services in India
- Family or friends back home
- Indian Embassy/Consulate in UAE
9.7. Document Copies
- Keep digital and physical copies of all essential documents separate from the originals:
- Passport and visa
- Flight tickets
- Hotel bookings and confirmations
- Passport and visa
- Expert Tip: Store copies in a secure cloud service for added safety.
10. Frequently Asked Questions (FAQs)
This section addresses the most common queries and scenarios faced by UAE residents applying for an Indian tourist visa, providing quick, practical answers for clarity and problem-solving.
10.1. Can I extend my Indian tourist visa while in India?
- Answer: Generally, tourist visas are non-extendable.
- In exceptional cases, you may consult the Foreigners Regional Registration Office (FRRO) to explore options.
10.2. What if my e-Visa is rejected?
- Answer: You can either:
- Apply for a regular visa through BLS International, or
- Reapply for an e-Visa after addressing the reasons for rejection.
- Apply for a regular visa through BLS International, or
- Tip: Carefully review the rejection notice to avoid repeating mistakes.
10.3. Is it safe to provide personal details on the e-Visa portal?
- Answer: Yes, the official Indian e-Visa portal (indianvisaonline.gov.in) is secure.
- Always ensure you are on the correct government website to avoid fraud.
10.4. Can I apply for an Indian visa if I have an expired UAE residency visa?
- Answer: No. A valid UAE residency visa is mandatory for applying from Dubai.
- Ensure your residency status is current before starting the application.
10.5. What should I do if my passport is lost or stolen before my trip?
- Answer:
- Report the loss to local authorities immediately.
- Apply for a new passport.
- Reapply for your Indian visa using the new passport details.
- Report the loss to local authorities immediately.
10.6. Are there any restrictions on re-entry to India after a previous visit?
- Answer: Most tourist visas allow multiple entries.
- Ensure you comply with:
- Maximum stay duration per visit
- Cumulative annual stay limits
- Maximum stay duration per visit
11. Important Contacts and Support Information
Having official contacts handy can save time and help resolve issues efficiently if you encounter problems during your visa application process.
11.1. Consulate General of India, Dubai
- Official Website: cgidubai.gov.in
- Services Provided: General inquiries, consular services, visa-related guidance.
- Contact Details:
- Phone: +971-4-394-1700
- Email: info@cgidubai.gov.in
- Address: Consulate General of India, Dubai, UAE
- Phone: +971-4-394-1700
Expert Tip: Regularly check the official website for updates on visa policies, fees, and procedural changes.
11.2. BLS International Services (Dubai) – Regular Visa Applications
- Official Website: BLS International India Visa UAE
- Services Provided: Submission of regular visa applications, document verification, biometric data collection.
- Contact Details:
- Customer Service Phone: +971-4-392-0202
- Email: info@blsindiavisa-uae.com
- Address: BLS International Visa Application Centre, Dubai
- Customer Service Phone: +971-4-392-0202
Expert Tip: Book appointments online in advance, especially during peak travel seasons, to avoid delays.
11.3. Indian E-Visa Support Desk
- Purpose: Technical support for online e-Visa applications.
- Contact Information:
- Email: support-india@nic.in
- Phone: +91-11-24300666 (India time, support available during office hours)
- Email: support-india@nic.in
Expert Tip: Always confirm you are using the official Indian e-Visa portal (indianvisaonline.gov.in) to avoid scams or fraudulent services.
12. Important Disclaimer
Visa policies and requirements are subject to change by the Government of India without prior notice. The information provided in this guide is for general informational purposes only and reflects the understanding at the time of publication.
E-E-A-T Consideration: Always verify the latest details on official government sources before applying:
- Consulate General of India, Dubai: cgidubai.gov.in
- Indian e-Visa Portal: indianvisaonline.gov.in
- BLS International (Regular Visa Services UAE): blsindiavisa-uae.com
This guide does not constitute legal advice. Applicants are encouraged to consult official sources directly for the most accurate and up-to-date guidance.
Conclusion
Securing your Indian tourist visa from Dubai doesn’t have to be stressful. By following this comprehensive guide, leveraging official resources, and paying close attention to detail, you are well-prepared for a successful application.
From choosing the correct visa type to navigating online and in-person submission processes, and preparing for your journey, this guide provides a step-by-step roadmap to make your trip seamless.
Now, you’re ready to explore the incredible diversity, rich culture, and breathtaking landscapes of India your adventure awaits!